

Dealing with Algae in Freshwater Aquarium
Algae can be a frustrating battle at times; however, it's not a loss cause or a reason to completely strip a tank in most cases. Throughout this article, I will go over several types of algae, how to combat them, and how to correctly identify them. I will also address the cause of green water cause, typically thought to have been algae.
First off, most algae are caused by an overabundance of nutrients and light. Maybe your lights are too powerful, on too long, or too inconsistent. Perhaps you haven't thought about the window across the room that shines light onto the aquarium for 2 hours a day. There's a lot to consider when combating algae. However, finding the source is the first step to preventing and combating the growth, not getting fish to eat it! Although many fish may EAT ALGAE often by introducing them, this does not mean they will irradicate it. Instead, you may just be increasing the bio load and adding to the issue.
My point here is algae is caused by something, and it is managed by you and kept at bay by some fish.

Green Dust Algae (GDA)
GDA is your typical algae formed on the glass. It's slimy, green, or brown and easy to remove. Often it will also get on decorations, plants, and pretty much anything relatively smooth.
This algae is typically caused by too intense or too long a light duration. Therefore, controlling one or both may aid in mitigating its growth.
This alga is usually easy to clean; wiping or taking a sharp-edged object will remove it. Understand that this algae is very typical and often unavoidable to achieve things such as plant growth. A great cheap option to use is original magic erasers. (https://a.co/d/eHKsTLf) Ensure that it has no additives if you buy outside my link.
Now this is one of the easiest algae to combat with fish. Any algae-eating fish I list throughout this post will take to it, and although they will not irradiate it, they will control it to a degree. However, bristle nose plecos are one of the greatest for this type.

Green Dust Algae
Green Spot Algae (GSA)
GSA appears very similar to GDA but is much thicker and harder to remove. GSA occurs over time and is nearly inevitable, like GDA.
Prolific GSA is due to high nutrients and intense lighting; however, similar to GDA, lowering light and lessening bio load will reduce the abundance of this algae.
GSA is harder to remove and will require a sharp-edged tool to remove. Furthermore, many algae-eating fish will not be able to remove it. However, they will pick at it.
First, you need to check the nutrient levels, especially phosphate, to get rid of GSA. If the levels are too low, adjust accordingly.
Once the phosphate levels are high enough, you can remove all of the algae with an algae scraper.
Also, make sure you don’t leave lights on for too long. Nine hours is usually enough for most fish tanks.
The best plan of attack when combating this algae is to remove it so it doesn’t build up consistently. This is especially important as the longer it sits, the harder it is to remove.
The best algae eater for GSA will be a small army of nerite snails. These guys tend to hover over one spot and eat away at it slowly.

Green Spot Algae
GHA (Green Hair Algae)
Green hair algae is one of the most common algae issues aquarists combat. (myself included) It is also one of the most trial-and-error algae, meaning you may have to try several methods to correct the issue. Furthermore, you will notice no number of algae-eating fish will eliminate it. For example, I had to take out a handful of clump from my shrimp tank with 200+ and then put it in with 300+ BN plecos, which still exists in that tank after months. That being said, manual removal is the only way to eliminate it once it exists.
Let's talk prevention; light and nutrients play a considerable role like the other algae we have spoken of. However, this algae thrives in low-nutrient systems, typically with high light. You could ask yourself am I running my lights too long? Do I add fertilizer? Are my nitrates low?
This algae typically overgrows plants and fastly out competes them. Removal and adjustment are the proper way of addressing this. GHA will not disappear even if you adjust the problem. However, you will know your adjustments are working if it no longer grows.
If I had to recommend one aquatic creature to combat the issue, that would be Amano Shrimp; these are the only invertebrates I've noticed eating or picking at this type of algae.

Green Hair Algae
BBA (Black Beard Algae)
BBA is the most treacherous algae to encounter. It is typically dark purple to black and grows primarily on decor (wood, decorations, rocks) or plants. It is nearly impossible to remove manually and spreads rather quickly.
The number one prevention to getting BBA is to avoid introducing it. Believe it or not, this is easier than it seems. It's as simple as treating all your plants before you introduce them. Dip them in hydrogen peroxide mixed with water for 5-15mins. Furthermore, the same can be done for plants or decor with BBA. As for dosing, I use the simple method that you know you've used enough hydrogen peroxide when the algae begins to bubble.
As for other factors to the growth and spread of BBA, high phosphate levels/high nutrients and light rapidly enable its ability to grow and thrive; prompt removal by treating it will prevent growth and spread. (DO NOT TRY TO MANUALLY REMOVE IT through picking at it WILL MAKE IT GET WORSE)
When it comes to fish/invert control, there're a few options. Amano shrimp and Siamese algae eaters will consume it if it's not too long. Otherwise, if you kill the algae via hydrogen peroxide or liquid carbon, these and many other fish/inverts will consume the dead algae. (BN plecos, OTOs, Shrimp, Chinese algae eaters, and more) Understand that if you kill BBA, it will turn white or brighter purple; however, if you do not have a fish or invert to consume it, it will likely sprout back up, killing the plants it's on.

Black Beard Algae
Brown Algae/ Diatoms
Diatoms typically occur in new tanks. It appears as this small hair-like brown dust over the substrate or plants. This starts as a light brown dusting but can build to be a pretty thick ugly layer. Diatoms are plants, but they can exist with very little light. They are often associated with new tanks, high silicates, and high phosphate levels.
Diatoms are typically caused by the following
Insufficient lighting.
High levels of nitrates, silicates, or phosphorus and or low oxygen levels.
Immature fish tanks where the biological filter hasn’t completely matured.
Diatoms can be troubling to remove since there’re several methods to treat them; however, here are some options.
Deprive the algae of nutrients.
Use a vacuum to remove the algae from the substrate and wipe down the glass.
Perform water changes to extract nutrients.
Adjust lighting levels.
Ensure that your filtration system has a GPH rate of four or more significant.
Add more dissolved oxygen to the aquarium by adding an air stone or lowering the water temperature slightly.
Consider using RO water.
Blacking out the tank.
Fortunately, this can be combated with Oto’s and Plecos naturally.

Diatoms
Rhizoclonium Algae
This alga can be very misleading, often mistaken for hair algae. However, this algae is slimy, soft alga growing in fine brown or green hair-like strands rather like Hair algae. This algae is a form of green algae belonging to the Cladophoraceae genus.
I often obtain this in my shrimp breed-out tanks due to low flow from the sponge filters and water changing infrequently.
Therefore, you will typically get this algae from poor maintenance, low flow, and low nutrients. Fortunately, it is easy to remove, like hair algae. Just picking it out works.
There’s only one option for eradication, Amano shrimp.

Rhizoclonium Algae
Blue-Green Algae or BGA (cyanobacteria)
This is when we get into the 'not technical algae, algae.' Blue-green algae is a bacteria rather than an algae. It grows in thin layers that, as they get thicker, can be removed in slimy, smelly sheets. The most common variety in freshwater is a vivid green, but it can also be reddish or brown. It is incredibly suffocating and spreads rapidly.
Being a photosynthetic bacteria/algae, it typically appears present when the lights are on and almost dies out when the light goes out.
BGA is typically acquired via introduction to the tank. You usually receive a plant or decoration that has this bacteria on it.
Again the best action to prevent this is dipping plants and decorations in hydrogen peroxide.
No fish or invert will consume this; if fish or inverts try to consume it, they can get sick and die from the bacteria.
Fortunately, there're a few ways to eliminate it and eradicate it.
Green-blue algae remover. This product is power based and will eliminate it. However, it does reduce oxygen levels in the tank and causes fish to suffer. (This is the best method to eradication)
Blackout is another option. However, it needs to be extremely thorough. NO LIGHT can enter the tank. Therefore, the best practice is to wrap the tank in trash bags to stop any light from entering and turn off all the lights.
Lastly, the increase in flow will strip it from the blanketing state and allow it to get into the water column for treatment and get filtered out.
The best practice is to use all 3 of these methods in conjunction to eradicate it. Removing this is essential at first sight as it will kill fish and plants quickly.

Blue-Green Algae or BGA (cyanobacteria)
Green Water (Free floating Algae)
Green water is commonly considered algae; however, nothing will happen if treated with algae removers. Green water is hard to remove but simple if done right.
Green water is typically caused by lights being on longer than necessary and or direct sunlight from outside. The more prolonged and more intense the light, the more likely and quicker the water will turn green.
I firmly believe that there are only two methods to eradicate this.
UV sterilizer. I believe this is the only proper and safe way to eradicate green water. Depending on the severity of the green water, it may take between 3-7 days to clear up.
Heavy water changes. You nearly need to remove 75% of the water daily while reducing light to the tank. In my experience, this is still no guarantee to eliminating green water. Being its bacteria, it only takes a little to remultiply. Furthermore, these heavy water changes can be highly stressful to fish within the tank.
Green water isn’t deadly; rather, unsightful. I firmly believe that obtaining a UV sterilizer is the only way to eliminate it.

Green Water (Free floating Algae)

Substrates
This article will outline several substrates that can support low-tech and high-tech plants. This is a growing list and will be added to as I use or research other substrates.
Substrate
Fluval Substrate (https://a.co/d/4bFgNi9) PH buffering (https://www.petco.com/shop/en/petcostore/product/fluval-bio-stratum-aquarium) Non buffering
Fluval Stratum is a nutrient-rich, cost-effective substrate that offers excellent nutrition for your rooting plants.
The buffering version heavily affects the ph of the water, which aids in plant health but may affect certain fish species.
The nonbuffering bio stratum provides equal nutrition; however, it does not aid in buffering water but may be better for fish needing higher ph, such as guppies.
Against other suggestions, I don’t believe this needs to be rinsed. (I have never rinsed it after using it in almost 20 different tanks) However, if you intend to add it after the tank is established and filled, PLEASE THOURLY WASH AS IT WILL CLOUD THE TANK!
WARNINGS! This substrate can leach ammonia over time. Therefore, frequent water changes reduce build-up that will affect fish.
Fluval Stratum is in the middle of the range pricing and, for larger tanks, may not be ideal. Fortunately, it is widely available at most aquarium stores and department stores.
Pros
Widely available
Lightweight provides an ideal environment for roots
Leaches less ammonia
Cons
Not as long-lasting fertilizing and buffering effects
Dollar for dollar gets out-competed by higher-end substrates available online.

Fluval Stratum
Caribsea Planted (https://a.co/d/7pf3Rl7)
Caribsea is the most cost-efficient nutrient-dense substrate on the market.
This is readily available at most big retail companies, Petco/Petsmart.
Caribsea does not require rinsing and aids in bacteria buildup as it is enriched with bacteria in a wet bag.
Caribsea doesn’t fall anywhere near my top-tier choice in the substrate due to its granular structure. It is more similar to a gravel-like design which causes struggles with many carpeting and delicate root structures. This is because the roots struggle to move through the heavy, dense substrate. Therefore, if you intend to have carpeting plants or delicately rooted plants, this is not the substrate for you.
Caribsea is an excellent replacement for those that want to grow common plants easier and not have to use the root tab immediately. Again, however, if you intend to have heavy root-feeding red plants, I would choose another substrate better suited for that in this list.
Pros
Least expensive planted substrate
Great for easier plants
Cons
No Buffering
Heavy substrate, therefore, unable to grow high-end plants such as delicate carpeting plants

CaribSea
Flourite by SeaChem (https://a.co/d/7pf3Rl7)
Flourite is a clay-based option that offers an all-natural nutrient-based substrate that aids in plant growth. This substrate is most similar to dirt due to its dirty natural fertilizing attributes. With this does come its negative effects. It is the dirtiest substrate; if stirred up, it will immediately cloud the tank and cause it to turn brown/dirty red.
The clay-based substrate breaks down easily, creating an excellent environment for most low-tech and high-tech plants.
I’ve used this substrate personally in my 75-gallon tank, and it provided great nutrients to the plants; however, to combat the dirty nature of the substrate, I capped it with sand.
Flourite is a very cost-effective substrate that provides beneficial nutrients like higher-end substrates.
CAUTION- this substrate will cloud your tank if stirred; if you choose to use this, it is best to keep it undisturbed and is best for a show tank that you don’t intend to uproot plants from. (The alternative to this is capping the substrate)
Flourite is offered in several different granulations and colors as well.
Pro
Cheaper alternative substrate
No ammonia leeching
Cons
Extremely dirty substrate
Heavier granulation
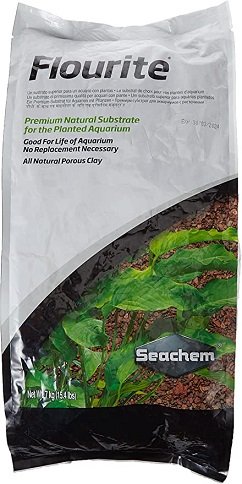
Flourite
Landen ( https://aquarockscolorado.com/collections/aquarium-substrate/products/landen-aqua-soil )
Landen substrate starts off the list with what I consider a high-end or professional substrate; this is also where my experience with substrate ends for now. (All other substrates listed will be based on research and public information)
This was the first personal profession substrate I used after extensive research; this is due to two primary considerations—less ammonia leaching and fair pricing.
Landen substrate offers an extremely rich nutrient-dense substrate with a great granulate size ideal for most high-end plants.
The landen substrate is lightweight and offers incredible root growth, allowing roots to move through the substrate easily.
It is offered in a few different granulate sizes and colors.
Unlike other professional substrates, Landen doesn’t leach significant levels of ammonia, therefore, requires fewer water changes to maintain water quality within the first 4-6 months of use.
Landen’s nutrient release lasts between 8-12 months before requiring supplementation with root tabs.
Pro
Highly nutrient-loaded substrate
Lightweight and ideal for all plants (high-end & Lowend)
Reasonably Price (offered in bulk by Colorado Rocks
Great buffering effects
Relatively clean substrate
Cons
Leeches a fair amount of ammonia, requiring frequent water changes in the beginning

Landen
Platinum AquaSoil (https://aquarockscolorado.com/collections/aquarium-substrate/products/platinum-aquasoil?variant=36894525718694)
Platinum AquaSoil is a Japanese-made soil that is a black ash base. This soil would also be included in the professional-grade due to its high nutrient load, which releases ammonia and other nutrients into the water. Therefore, requiring frequent water changes for months on end.
Like Landen substrate, Platinum AquaSoil offers an extremely rich nutrient-dense substrate with a great granulate size ideal for most high-end plants. Furthermore, it is also provided in a powder form ideal for nano aquariums aiding in their aquascaping due to perspective.
Platinum AquaSoil is also one of the heaviest buffering substrates making it ideal for Cardinia shrimp breeding/keeping.
Pro
Highly nutrient-loaded substrate
Lightweight and ideal for all plants (high-end & Lowend)
Great buffering effects
Cons
Leeches a fair amount of ammonia, requiring frequent water changes in the beginning

Netlea Professional Soil (Netlea Aquarium Soil - Professional Version – Aqua Rocks Colorado)
Netlea is another substrate I am incredibly excited to try in the future. Essentially, imagine you bought the nicest organic soil, cleaned it up, and pressed it into little balls. That's Netlea Soil.
Like other professional soils, Netlea buffers the substrate and releases significant ammonia. Furthermore, it is backed with essential elements and free iron deposits (for red plants).
It is essential to note this substrate cannot support medium to high ph fish or fish that require hard water. Netlea has natural anti-buffering agents preventing those levels from rising. (ph, kh, gh)
Another impressive perk to Netlea is it doesn't need to be washed and provides significant water clarity. This photo represents the difference between Fluval and Netlea.

Pro
Highly nutrient-loaded substrate
Reasonably Price (offered in bulk by Colorado Rocks
Clean substrate and Clear water
Cons
Leeches a fair amount of ammonia, requiring frequent water changes in the beginning
Extreme buffering effects limit fish options.

Netlea Professional Substrate
Amazonia V one (ADA Aqua Soil Amazonia 9L (aquaticwarehouse.com)
Amazonia is becoming difficult to source due to its importation from Japan and resource issues. Additionally, this has made it cost significantly more expensive than other soils.
Amazonia is known for being the OG aqua soil in the hobby; however, based on many other conversations with aqua scapers and propagators, this is no longer the case for V one or V2. Not because it isn’t practical but rather the cycling rate and price.
Amazonia is excellent and provides all the most significant attributes of many of the other substrates listed above. However, until I use it, I will not have a personal bias to provide.
Pro
Amazing fertilizing properties
Great water clarity
Superior substrate structure
Cons
Expensive
Hard to acquire
Leaches the most ammonia

Keeping Shrimp
Shrimp were one of the first things I started breeding in this hobby. As simple as I thought they were, it came with a slew of learning curves. Throughout this blog I will describe each different species of freshwater shrimp and how to keep them and breed them.
Ghost shrimp were one of the first shrimp I started keeping in this hobby. There’s a large misconception about these invertebrates, though. Although very cheap, they are not great for keeping in your freshwater tank. They are primarily a scavenger feeding off leftover foods. Furthermore, they are very aggressive and may eat or pester other fish and shrimp. Many believe they are algae eaters, but this is not true.
These shrimp are actually native to the US in the southeast. Ghost shrimp are very hit or miss on survival due to their short life spans of a couple months to a year max. I want people to understand when it comes to ghost shrimp; you may not be doing anything wrong rather you purchased them at a mature state close to the end of their life. The consensus with these inverts needs to be changed from a keepable invert to a feeder or scavenger for those that tend to overfeed.
Ghost shrimp aren’t impossible to breed, rather the reason you don’t see their babies after being berried for a month is because they eat their larvae. Therefore, if you intend to breed them you need to separate females after their eggs turn greenish and have them in a breeder box so the shrimplets can slip through and survive. You don’t see these bred in the hobby mostly because its not worth the time nor the money.
Parameters
Temp 65-75
Ph 7.0-8.0
GH 3-10
KH 3-15
Although their not ideal environment these shrimp can actually acclimate to salt water.

Ghost Shrimp
Amano shrimp are next on the list. These shrimp look very similar to glass shrimp but serve a greater purpose. Amano shrimp are a absolutely great algae eater and will combat anything from hair algae to black beard algae. These shrimp get quite large, hence having a harder impact of algae. Amano shrimp in my opinion do look a lot better because as they get older they get a speckled pattern to their body.
When it comes to breeding, it's not impossible; however, it is extremely difficult! Amano shrimp live in rivers and streams connected to saltwater outlets. In the wild, they go to these brackish rivers and release their eggs, where they dissolve, and the larvae thrive and grow in saltwater/brackish waters. They feed on phytoplankton at this phase, and one reaching half an inch travels back to freshwater, where they live out their life cycle.
This being said the exact needs to be done in the home aquarium. You must separate berried females and acclimate them to brackish waters, where like ghost shrimp, you put them in a breeder box so they can release larvae. Once larvae have hatched, you must religiously feed phytoplankton and then raise the larvae as such. Once done, gently acclimate them back to freshwater. This is a very time-consuming advanced breeding practice, and I recommend you try other shrimp and fish first before trying this.
Amano Shrimp can be kept in a wide range of parameters and being they get relatively large they can also be kept with several types of fish.
Parameters
Temp - 60-80 degrees
Ph - 6.0-7.8
GH - 0-14
kh 0-10

Amano Shrimp
A more exotic Shrimp to add to this list is Bamboo Shrimp and Vampire Shrimp. These freshwater shrimp get very large (up to 4 inches) and are more of a pleasure invert then that of a utility invert. These shrimp feed by filtering the water through their fan like hand. Therefore, making them a bit harder to keep. Since these some from fast moving streams they require a similar caring process. To keep them you will need faster flowing water, therefore, use of a powerhead or several powerful filters to keep food particulates suspended.
The key to success is heavy flow and powdered foods, however, this comes with its downside as these types of foods can lower water quality quickly. Thus its a tricky game to keep these guys well fed and thriving without causing fatal water conditions.
When it comes to breeding these shrimp are near identical to amano shrimp by which they need brackish conditions to hatch their eggs and special care and food to raise.
Parameters
Temp - 74-84 degrees
Ph - 7.0-7.5
DKH - 3-10

Bamboo Shrimp
Neocaridina (aka cherry shrimp) are one of the most popular shrimp in the hobby and surely the one people often get misconceptions about or don’t know how to proper keep and succeed with. I have years of experience with these shrimp and have diffidently went through hardships and successions with them. Today I keep these shrimp in drastically different conditions to what I did years ago. I will go over some of my mistakes and successes so that you don’t have to suffer the consequences in the future.
Neocaridina have widely adaptable parameters, however, whatever you keep them at MAKE SURE ITS CONSISTENT. Consistency is the key to success with them. If you make drastic changes or chase numbers these little guys will suffer. Furthermore, when you bring them home be sure to acclimate them slowly. I recommend drip acclimation and floating to adjust temperature. I’ve lost whole colonies from rapid temperature changes. Just because they can be kept in a wide range doesn’t mean they can adapt quickly to it.
Breeding these guys is extremely easy as I stated before just keep them consistent and fed. My favorite food for these guys in Shrimp King Complete ( https://a.co/d/gv7qlnl ) Speaking of feeding be wary you can easily overfeed shrimp and being that shrimp are extremely sensitive to ammonia this can be detrimental to their life. Its better to underfeed as they will find food then to overfeed and risk spikes. 4
Once these have bred its incredibly important to have proper filtration in order to protect the baby shrimp from being sucked up from filtration. In the beginning I used HOB filters, with such I quickly learned that although I saw babies they were disappearing. Later I found many of these stuck in the filter. From there I installed a course piece of material over the filter which made all the difference. Later when I kept these guys exclusively by themselves I used oversized sponge filters, which made for great surface area for them to graze on and keep beneficial bacteria in the tank.
Parameters
Temp 60-85
Ph 5.8-8.0
GH 4-14
KH 0-10
As you can see parameters are wide but consistency is key. I will go further in depth in another post to talk about my parameters and other issues I have come across and how I got over them.
My Berried Neo
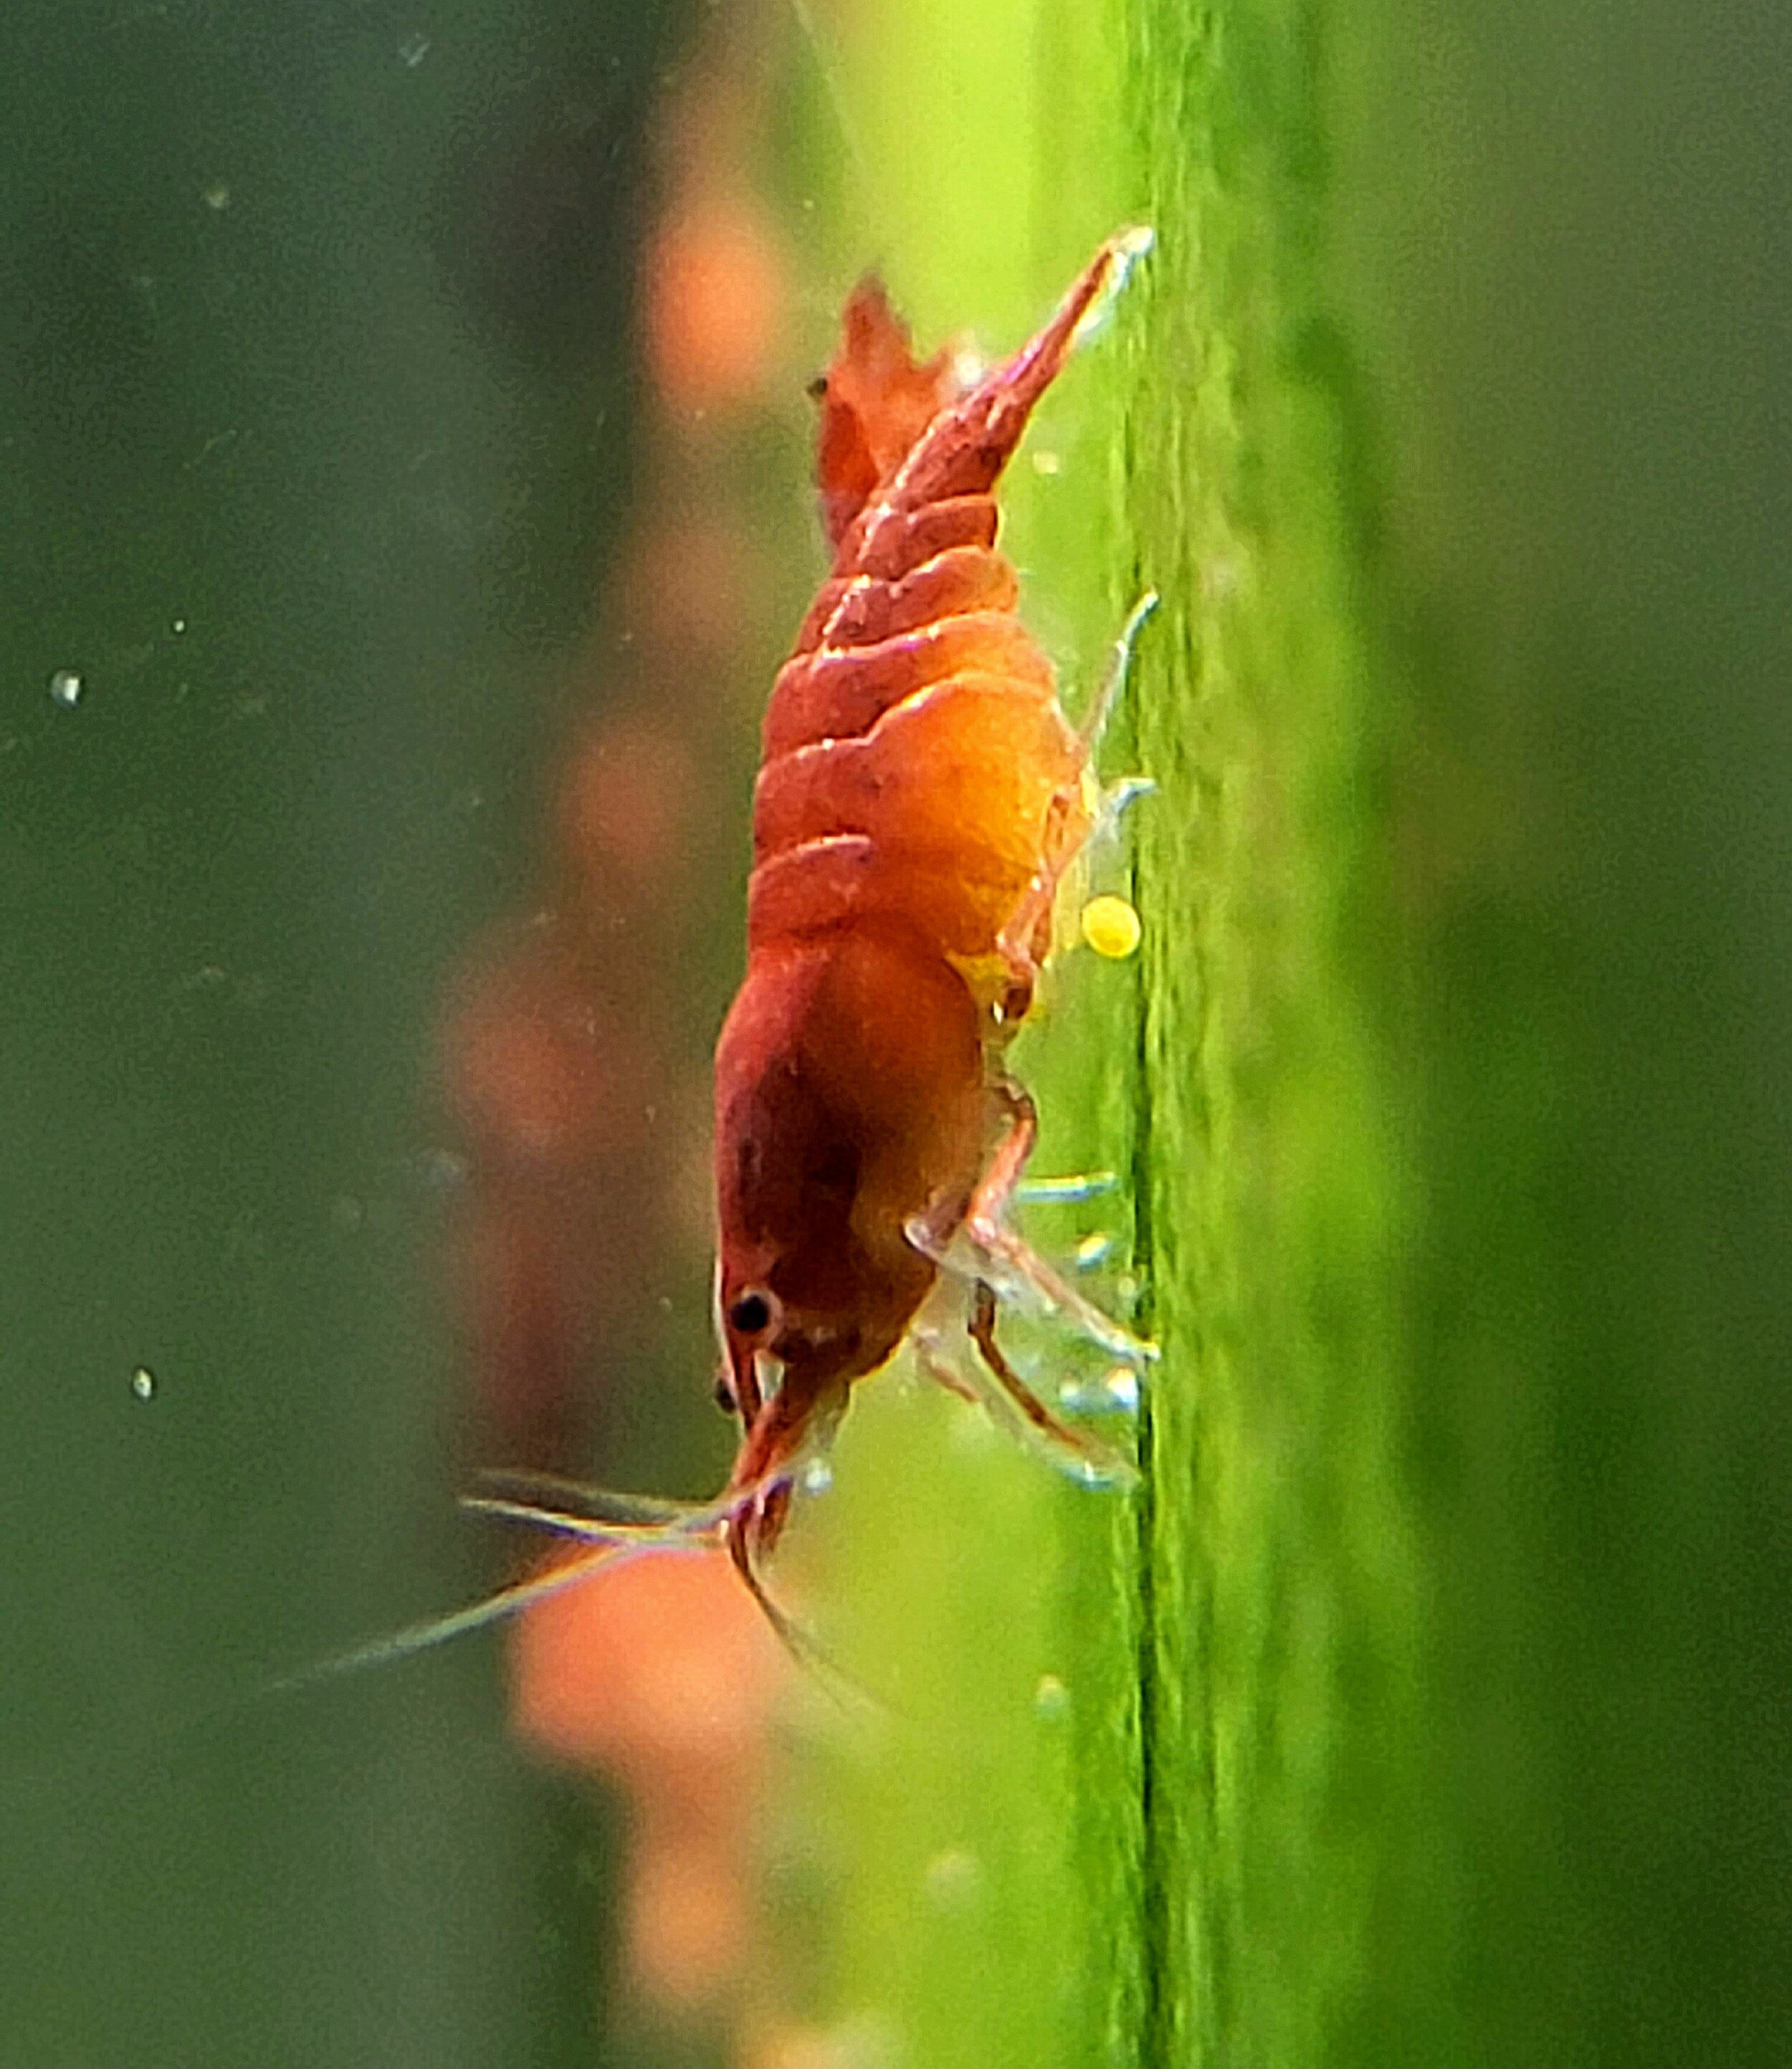
Lastly is Caridina Shrimp (aka Bee Shrimp), these shrimp have diffidently been the most challenging over the years as they require very specific parameters to live and breed in. These shrimp are known for their beautiful colors and patterns.
Now specifics, these shrimp require RODI water buffered with a GH solution to 4-6 dkh. Furthermore, they are a primarily vegetarian shrimp and don’t require as rich of a protein diet as neos.
These shrimp must have some type of buffering substrate to maintain a low ph. Being that substrate looses its buffering capability over time that also means you will need to change it out overtime. Like other neos these parameters need to be constant and overfeeding is detrimental to their health.
Parameters
Temp 62-72
PH 5.2-6.0
GH 4-6
KH 0-1
TDS 120-200
Like neos I will be making another blog dedicated to caring for these successfully.

My Blue Bolt Caridina
Understand with all shrimp they are extremely sensitive to ammonia and nitrates. Ensure you maintain 0 ammonia, 0 nitrites and below 20ppm of nitrates.

Is saltwater harder than freshwater
The short answer is YES! However, let me explain why and give some examples from my experience. I started with Freshwater and exclusively kept and bred freshwater fish for about a year and a half. Once I started my journey into saltwater, it became quite the learning curve and a slew of trial and error I had not yet experienced with saltwater.
Differences I Learned
Freshwater - when it comes to freshwater outside of cycling there’s few things we focus on, on a basic level
Nitrates
PH
TDS (if your into particular species)
This can go further if you have gotten into CO2 tanks and heavy plant propagation; however, if you are at that stage, you still have learning to do about saltwater.
Saltwater - Fish only system
Nitrates
PH
Salinity
Phosphates
Although this is not a lot more than freshwater, it's likely this is not what most people imagine when it comes to getting into saltwater.
Saltwater - Beginner Coral
Nitrates
PH
Salinity
Alkalinity
Phosphates
As you can see, the list continues to grow. These things need to be continuously monitored and precisely kept. If not controlled strictly, they can cause catastrophic failure.
This list continues to grow as you advance in your coral collection. However, it isn’t about the length of the list but rather the precision that things need to be kept in the list. For instance, if PH is too low, corals will suffer, if PH is too high, they will suffer; too inconsistent same will occur. For fish only, letting salinity drop too much fish die; too high fish die. As you can see, there’s quite a common occurrence here. On some occasions, the same can be said for freshwater; however, at the same time, I have seen Chilids do fine in 72-degree water with 7ph and 82-degree water with 8ph. The same can’t be said with salt water. Then add in when you’re talking about a fish costing $5 compared to one of the cheapest in the saltwater hobby costing $20. There’s quite a different level of risk in relation to your wallet.

Now lets address the largest difference from fresh to salt
You CANNOT USE TAP WATER!
I’m not going to talk about special occasions, however, understand due to the complex chemistry of saltwater, it is pertinent that you exclusively use rodi to top off and or mix your salt into. By not doing this, you will see significant issues
Fish Struggle
Algae Growth
Corals Die
It’s not a matter of if but rather when.
Therefore, you either have to set up a RODI system or source RODI and Saltwater from a local shop.
Again if you are an advanced freshwater aquarist, you might be familiar with this. Fortunately, I was familiar with this requirement due to keeping cardinia shrimp.

RODI
Equipment
When I started saltwater I thought I could use similar equipment to what I used in freshwater. Oh was I wrong.
My original saltwater set up consisted of:
60 Gallon Cube Rimless
AI Prime Light
Oversized Canister Filter
Overtime I added to this because I struggled to keep coral and maintain healthy nitrate levels.
Additions
HOB Filter rated for 75 gallon
HOB Protein Skimmer
Radion XR15
Unfortunately, this still didn’t solve the issues, I this had insane algae growth and high nitrates. I was doing 30% weekly water changes and spending nearly $20 a week on water alone.
Fast forward to today, I upgraded to a larger system with a sump (RedSea 425XL). This change drastically changed the game for me. It allowed for better filtration, easier top-off to maintain salinity, and overall fewer water changes.
Equipment current set up
ReefMat 500
OCTO 250 protein skimmer
Carbon Reactor
GFO reactor
UV sterilizer
Doser (dosing Part 1&2, neo nitro)
T5 Hybrid Lighting
I can finally say I feel successful with this set up. My corals are growing and my fish are thriving.

Tank from February 2023 (check IG for updates its grown immaculately)
Alright now for the most stressful part of Saltwater ALGAE, PESTS, PARISITES AND DISEASES.
I struggled with this in both the 60-gallon and the 90-gallon RedSea. Now this is not to say I haven’t struggled with it in freshwater, but there’s a difference when it comes to freshwater fish that cost $10 dying and Coral/ Fish costing $250 dying.
Treating these issues in saltwater is much more tricky due to coral sensitivity. For instance, when I got diatoms, I had to black out the tank for a week, and as a result, I lost a $150 coral. Let's compare issues and struggles treating
Freshwater
Hair Algae
pulled it out lowered lighting
Green Water
added a tempary uv sterilizer
BBA
Treated with peroxide
clean up crew took care of the rest
Ich
used ich X
I’m sure there’s others but but it was all fairly simple and straight forward.
Saltwater 60 cube
Nitrates
water changes (negative)
Extra filter (negative)
Protein skimmer (kinda)
Less feeding (kinda)
Phospates
Phosguard (accidently used too much killed some corals from lowering too fast)
Less Feeding (kinda)
Lack of coral growth
better light (yesish)
more consistant water conditions (for a short time)
Algae
all the above, however, I took down the tank still struggling with it
RedSea 425xl
Diatoms
blackout (worked but killed some coral)
Diatoms again
blackout (worked but came back a third time)
discovered the source was too low of nitrates
used neonitro to raise (no issues since)
ich
rally pro/ ich pro (didn’t work started having coral struggles)
UV sterilizer (kinda)
ended up leaving the ich in the tank and feeding fish more nutritialy dense food/ vitamin C to elevate immune systems
conclusion, its still around but its managed
hair algae
lowered lights and added clean up crew (worked)
Turf algae
my current battle (plan to use algae flux
Flatworms
pulled coral and dipped (just in time)
Alkalinity/PH drops
water changes (kinda)
Doser with part one and two (worked but needs constant dialing)
Aptasia
filefish (negative)
aptasia x (negative)
bergia (kinda)
still in the battles
I’m sure I’m missing some issues but the fact is, is that the struggle and learning curve is never ending.

This is what tap water and in adequate maintenance does! Trust me I’ve seen it in person.
Now for the last factor COST
Although this isn’t a factor of difficulty, it is a factor to consider. My first 60-gallon was budget-driven; however, when I invested better, the hobby got much better but more expensive. However, the difference was astronomical. My first tank all in, I probably invested about $1,500 in equipment. My current one I’m nearly $5,000 into. This is all without considering fish and coral. So that being said, be prepared for the expense. Unlike freshwater, it adds up to extreme levels. One fish can set you back 100s, and a mistake can cost you a lot.
Feel free to reach out about questions. Saltwater is a wonderful hobby but it’s sure to challenge you and your wallet.

Low Tech Planted Tank Care Guide
Low tech planted tanks to me are considered those that consist of light between 10-100 par (Photosynthetically Active Radiation) non C02 and semi rich to non infused substrate. That being said there are several things to consider when choosing plants and caring for plants in your low tech system. Most importantly being temperature and substrate. Too hot of temperatures can result in melting of many plants and not having nutrient rich substrate will also hinder growth and health.
With this in mind lets dive into why your plants might be dying.
Working for Petco and being an avid hobbyist in the aquarium plant propagation, I have seen both good plants and bad plants, along with the various ways their grown and acclimated. Therefore, choosing the proper plant from the right place or individual is vital to its success in your aquarium.
Many aquarium plants are grown emersed to reduce cost. This is where the roots and part of the stem are underwater and the rest of the plant is grown out of the water to provide free Co2 exchange. Unfortunately, these plants struggle when transitioning into our home aquarium due to the lack of CO2. Most of the main stream department stores sell plants raised this way. Therefore, in the event your plant starts melting this may be the cause of it. The addition of C02 or high oxygenation through bubblers may help reduce this melting in the beginning and give it time to convert over to being fully submersed.

Another thing to consider when caring for plants is the temperature of your water. Some plants such as java moss and monte carlo struggle with high temperatures. Additionally high temperatures in planted tanks supplement algae growth which can disturb and smother plants. Just as fish transitioning them from a cool water to hot water can cause death or deterioration. Unfortunately, there isn’t a easy fix to this other than reducing the temperature. In the event you find a plant that is normally kept in cool water that you want to add to your warm water tank, it might behoove you to source a local aquarist that grows it in those warmer conditions or taking the time to slowly transition it to your warmer water by slowly elevating the temperature over months.
The following are plants that do well in warm water 78+
Marimo Ball
African Water Fern
Java Fern's(All Variants)
Brazilian Pennywort
Hygrophila's
Cryptocoryne's
Anubias's
Sword Plants
Dwarf Lotus

Java Fern
When it comes to substrate I highly recommend when setting up a planted tank to use mineral enriched substrate by which you can refer to my substrate guide. However, this isn’t always what available or within budget. That being said if rooting plants are melting in your sand or gravel there’s ways to fix such an issue without completely removing your current substrate. When dealing with sand and semi fine to fine gravel you have the ability to use root tabs.
SAND
Lets start with sand, sand is a popular cheap option when setting up tanks. However, there are many plants that struggle pushing their roots through sand to grow and expand. Rather than list the plants that struggle in sand I will list the plants that do well in sand.
#1 Amazon Swords
#2 Cryptocoryne
#3 Hygrophila polysperma
#4 Hornworth
#5 Anacharis
#6 Ludwigia Repens
#7 Madagascar Lace
#8 Camboba
#9 Rotala Indica
#10 Dwarf Hairgrass (Carpet)
#11 Myrio Filigree
#12 Lemon Bacopa
#13 Italian Val
#14 Tiger Lotus
#15 Jungle Val
#16 Dwarf Sagittaria (Carpet)
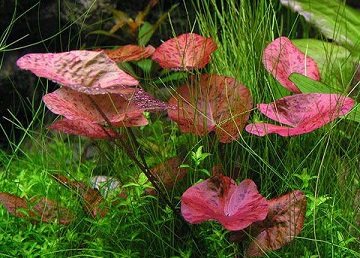
Tiger Lotus
Now each of these plants thrive more in sand then lets say gravel, however, they need additional supplementation to support growth. Hence, placing root tabs below the plant will aid in growth and health. Being these plants are accustom to sand they are also normally found in regions of warmer water. Therefore, most make for great additions to those warm water tanks as well.

Dwarf Sagittaria
GRAVEL
Gravel is a tricky one because it comes in various circumferences. This circumference can widley effect the different plants that may be planted in it. However, like sand I will go over several options for your gravel tank but I will also speak to the struggle in the different circumferences with some of these plants.
#1 Amazon Sword
#2 Cryptocoryne Wendtii
#3 Madagascar Lace
#4 Red Tiger Lotus
#5 Vallisneria
#6 Dwarf Sagittaria
#7 Anacharis

Amazon Sword
As you can see many of the same plants can be used in gravel as sand. Now why gravel tend to be more limited is do to the inability to fertilize it. Due to the gaps between rocks. Root tabs generally can’t be used because the contents of them will leach into the water spreading ammonia which will affect the fish. This can be worked around with extremely small pebbles that present little to no gaps. However, be aware they still posses gaps and if you choose to use it you need to plant the root tabs as deep as you can to reduce any risk of leaching.
Plants that don’t care about substrate
There is a slue of plants that aren’t effected by the substrate you choose, rather they prefer to have their roots (rhizomes) exposed. Thus, these plants should be glued or tied down to a structure, such as wood, rock, or decorations.
Anubias
Bucephalandra
Java Moss
Java Fern
WIth the exception of java moss these plants don’t mind warm water either. Additionally, they are great for scaping and filling in empty space due to their ability to be planted anywhere.

Bucephalandra
Melting Plant Trouble Shooting
Outside of temperature and substrate are the other key factors, nutrients and lighting. As I already alluded to many plants need their roots to be fertilized, therefore, the root tabs can aid in that suplementation. The following are some of my favorite root tabs.
ThriveCaps (https://a.co/d/bR2fZFD)
Easy Root Tabs Aquarium Co-op (https://www.aquariumcoop.com/products/easy-root-tabs )
2 HR aquarist Jazz Root Tabs (https://a.co/d/1helSMf)
Now these are only a few of the many that are available. However, I believe that those in capsules are superior due to slower release.

Aquarium Co-op Root Tabs
Next to consider for supplementation/ nutrition is liquid fertilizer. These fertilizers can greatly aid in plant growth and color, however, once you start using them you will need to do more often water changes to reduce excess fertilizer build up in the water column. Additionally you will need to remove any carbon as it will strip that fertilizer out soon after its addition.
The following are my favorite beginner liquid fertilizers.
Thrive Planted Aquarium Fertilizer (https://a.co/d/4JCgD6O)
Aquarium Co-op Easy Green (https://www.aquariumcoop.com/products/easy-green-all-in-one-fertilizer)
Tropica Specialized Fertilizer (https://a.co/d/hbzdUZU)

Thrive Plus
The last thing to consider when your trouble shooting plant decay or melting is lighting. Many people start out with the basic led’s that come with kits or find the cheapest options. This may work for tanks with low depth, however, as you get to deeper tanks achieving par at the bottom of the tank becomes difficult without the proper light. Please refer to my blog on finding the right light for your tank.

High-End Light Guide
Want your reds to pop? Want your plants to grow thick and lush? Lights are a huge part of achieving such a result. This post will outline most high-end lights on the market with as many details as I can gather for you to make an educated choice on your next light. Understand that many of these light specs are illustrations from manufacturers and retail sellers. I will also outline my experience with the coloration and intensity these lights provided, along with price and availability. For a fair comparison, I will compare every light based on a 60-cm or 24-inch light.

High-End lights tend to offer an aesthetic unparalleled to to others. Their sleek streamline designs add a different perspective to rimless tanks and for your display tank may be the thing that takes a once nice looking tank to an eye popping statement.
Aqua Illumination Blade Freshwater $190 ( https://www.bulkreefsupply.com/blade-smart-led-strip-freshwater-aqua-illumination.html )
The newest high-end light on the market, this light was originally designed for saltwater tanks to replace T5 bulbs. The blade follows the design of your typical of a flat bar led.
The AI Blade offers little detail on its exact specs however, what I could find is as follows.
24 leds per cluster therefore, 48 leds broken down as follows
32 cool white
8 warm white
4 red
4 blue
This light is sure to provide great power but not necessarily great contrast. Without any greens and a small amount of reds the deep red plants will lack their richness.
48 watts
This power is defninltly on the lesser side of the other that will follow, however, this may be a great entry level to getting a strong par level to the bottom of that display tank.
Pros
Great interface, AI has multiple platforms for app manipulation and offers seamless control
Sleek low profile
Cons
Less spectrum, focuses on whites which provide great par
Less spread, due to its mounting it won’t have a large area of coverage and may result in needing multiple lights

AI Blade Freshwater
Week Aqua P600 Pro $200 (https://aquarockscolorado.com/products/week-aqua-pandora-series)
I consider the Week Aqua the Black Box of High-End lights. A light that performs with the intensity of some of these most expensive yet is offered at a low price. I personally own the p900 and am in early testing of it.
Specs
110 LED’s 10 of which are UV (an option not offered by many others)
90 watts
9k-12k Kelvin
5400 lumens
This light is bluetooth enabled with its own app. The app offers full control and preset options.
Furthermore, through my testing it contrasts a nice rich red color when prioritizing reds.
Pros
Spectacular intensity for its price.
Great control
UV power
Cons
Bulky, this light is on the large size
App is a little more difficult to navigate and control
Overall this light is wonderful, and widely avilible through several vendors.

Week Aqua P600 Pro
LEDSTAR AQ Z $220 (https://bloomtanks.com/products/ledstar-aq-z-series-rgb-w-led-light-with-app-control-3-sizes)
LEDSTAR is first on the list with a sleek design. Again a great priced high power LED.
Specs
112 LED’s, 80 white, 32 RGB
72 Watt
9k-11k Kelvin
5000 lumens
This light is bluetooth enabled with its own app. The app offers full control and preset options.
The distributors of LEDSTAR offer great contrast into the wavelength spectrum/ Par Graph
Pros
Great Price for its power rating
Sleek design
Cons
Limited available vendors
Less spread
Understand I haven’t personally tested this light, however, check out Tanktastic’s review of the tank on YouTube where he does an unboxing and Pars the light. (https://youtu.be/EuWPAImxCGc)

LEDSTAR AQ Z
Twin Star 600SP $230 (https://buceplant.com/products/twinstar-led-sp-model-1)
Another great sleek design, twin star is known for its wonderful color.
Specs
156 LED’s 126 RGB, 14 White
52 Watt
6500 Kelvin
3250 lumens
This light doesn’t offer Bluetooth like some of it’s competitors rather is a plug and play. (simpler for some)
This is one of the more widely available lights offered by several companies in a large degree of series. (Understand this is their highest model)
Pros
Sleek Design
Wonderful for red plant contrast
Cons
Due to its high number of RGB leds it doesn’t contrast green well
None controllable
Understand I haven’t personally tested this light, however, check out JJ Aquariums review of the light on YouTube where he does an unboxing and showcases the light. (absolutely beautiful tank he has) https://youtu.be/vcpG-KH4PtQ

Twin Star 600SP
Chihiros WRGB II $250-300 (https://aquarockscolorado.com/products/chihiros-wrgb-ii-pro?variant=42266625802488)
One of the most widely reviewed High-End lights, Chihiros WRGB II is proven and true to its specs. A lot of companies have focused on surpassing its performance while trying to beat its price.
Specs
60 LED’s
67 Watt
3k-13k Kelvin
4500 Lumens
This light is bluetooth enabled with its own app. The app offers full control and preset options with great manipulation.
The WRGB II has one of the widest spreads, allowing to cover a wider tank like my 75 gallon aqueon.
This light is probably the most widely available light, offering a lot of competition for pricing.
It also has a built in diffusor which does cause for a lesser par but better spread.
Pros
Tried and true
Great build design, Sturdy
Nice app
Cons
Its become a bit outpriced
This was my first High-End light, and it diffidently hasn’t disappointed. Even on my 75 gallon I still haven’t ramped it up all the way. There’re countless videos on YouTube, however, I will link some comparison videos as I believe those show what your really wanting to know. TankTastic https://youtu.be/j5-IFxVfZqE MD Fish Tanks moving from low tech to high tech https://youtu.be/upvBCOXa9EA

Chihiros WRGB II
ONF Flat ONE $400 (https://buceplant.com/products/onf-flat-one-led-light-blue-white?)
The ONF Flat ONE is probably one of the most atractive light on the market. TankTastic says it well in his review, it reminicent of a MAC book. Sleek, well polished, and wide.
Specs
120 LEDs
70 watts
3500 Lumens
3-6k kelvin
This light is bluetooth enabled with its own app. The app offers full control and preset options with great manipulation.
Similar to the WRGB II it has a very wide spread. (5 1/4)
An additional perk is the quick tap control on the top.
It also has a built in diffusor which does cause for a lesser par but better spread.
It is also widely available through several distributors.
Pros
Sleek design
Great Control
Cons
A bit overpriced for its performance.
Less par
For a lower tech display tank this makes for a beautiful display due to both its design and coloration.

ONF Flat ONE
Kessil a360x Sun $440 (https://a.co/d/bEgjsei)
The Kessil Sun is a light I have more recently fallen in love with, not due to it power, output, or pricing. Rather the unique shimmer it adds to the aquarium.
Kessil’s lights provide the best simmer in the market. No other light gives the unique look to the tank like this light does.
In addition to its unique lighting it is the smallest and lowest profile light on the list.
Specs
46 Leds
90 watts
6k-9k Lummens
kelvin?
The a360x provides a 130 degree spread while only being the size of a hockey puck at twice the thickness.
Pros
Unmatchable shimmer
Great attachments to modify use for various aquariums and applications
Small size
Cons
High Price for output
Not wifi capable out of box (The Kessil a360x requires either a kessil controller or Kessil wifi dongle to minipulate its spectrum)
The Kessil a360x Sun is a spectacular light if your looking to make a statement with your show tank. It will be sure to draw attention.

Kessil a360x Sun
Chihiros Vivid II $450 (https://aquarockscolorado.com/products/chihiros-rgb-vivid-ii-10th-edition)
When you think of a high-end freshwater light this is what comes to mind. Great build quality, wonderful app, and tried and true design.
Specs
160 Leds
130 watts
12200 Lumens
kelvin?
Same great bluetooth platform as the WRGB II
Widest spread of light at 6 inches
It also has a built in diffusor which does cause for a lesser par but better spread.
Pros
Extremley powerful, will grow anything you want within its spread.
Great Control
Cons
Shorter length, unlike others for the price it will cover the length of the tank with a single light
Bulky, it is a thick large light and doesn’t present a streamline look like its competitors.
This is the light you go to when you when you want to grow the highest end plants and present them the best way.
Check these YouTube reviews out to better get a picture of what this light enables. UK aquascaper George Farmer https://youtu.be/SXZ7LUPIFAk Tanktastic’s comparison video https://youtu.be/2m3oZ6p145Q

Chihiros Vivid II
Radion G6 XR15 Freshwater $500 (https://aquariumsupplyonline.com/shop-aquarium-supplies-online/radion-xr15-g6-freshwater-led-light-fixture-ecotech-marine/)
This light comes from the tried and true line of some of the best Saltwater lights in the hobby. The design, app control, and build and wonderful.
Specs
48 leds
12x Warm White
24x Cool White
3x Photo Red
3x Green
2x Blue
2x Lime
1x Moonlight White
1x Moonlight Blue
90 watts
lumens?
Kelvin?
This light has one of the best app options of any other light on the list. There’re two different apps this can be manipulated and controlled on.
You are likely to find this light in your local store being it US sourced and many stores carry its saltwater version. If not having it on hand they will have ease ordering it for you.
Pros
Great build quality, coming from saltwater you have to expect a quality unlike many others
Great Par, with so many whites it will penetrate to the bottom and grow those carpets.
Cons
Color, similarly to AI its has limited RGB leds, therefore, limiting the pop on red plants
Spread, this has to be mounted high to create the spread of its competitors because it is a short stubby light.
There’s a lot still to be found about the light. Unlike its saltwater version testing is limited because it tends to get shadowed by its Chinese aqua scaping light competitors.
The only YouTube video I could locate on this light is from Ecotech itself. https://youtu.be/fuEaDrcsYCs However, my friend Hector has 4 himself and I will further look into it and may create a true review of it myself.

Radion XR15 G6 Freshwater
ADA Solar $850+ (https://aquaforestaquarium.com/products/solar-rgb-led-lighting-system)
The ADA Solar is known as the penicel of High-End freshwater lights. It provides the greatest power and best light spectrum. However, it also comes with the price.
Specs
160 leds
130 watts
3500 lumens
kelvin?
This light does not offer bluetooth control, rather the manufacture states that the way it comes is the best. Therefore, catering to expert level aqua scapers.
The build quality is top tear, its made from the best parts available.
American availability is limited through very few vendor in the US.
Pros
Spectacular Spectrum
Extreme Power
Cons
Price, with the build quality this light doesn’t come cheap
Controllability, being its plug and play, there’s no room for flexing your own look. (not that you need to with this light)
JJ Aquariums does a wonderful job at reviewing the ADA Solar, so check him out and see if it fits what your trying to do. https://youtu.be/WZfGmOQoNQ0

ADA Solar
I will be looking into a few other light soon to include kessil.
I am open to listening and revising my statements on these lights based on people that have or had experience with them personally.
What's the right light for my tank to start off
Height is the most important factor when considering a light to support a planted tank. However, this is less of a factor for non-planted aquariums. Regarding non-planted aquariums, I don’t believe there is a reason to consider any high-priced lighting. Having used 10+ different lights, I’ve seen what works, what doesn’t, and what’s overpriced. Learn from my mistake and buy a light that works right for your size tank, budget, and demands.
Outside of the light, the most critical factor is scheduling; it is imperative that whether you have plants or not, you run your light for 8-9 hours on a permanent schedule. Your best bet is a simple analog timer for a few of the lights I suggest here. Consider this one from amazon if you're running one to two tanks, or need more than one light. https://a.co/d/aqUteO9 By scheduling your lights, you reduce the likelihood of algae growth and green water. Furthermore, you provide a natural environment for photosynthetic rhythm.

Analog Timer
Budget Light-
For tanks no greater than 12 inches in height or not planted, the best light for the price is by far AquaNeat. https://a.co/d/872MvgD These lights are absolutely amazing and highly budget-friendly. They are full spectrum and provide nice coloration. This light is perfect for growing plants in a 10, 15, 20L, 33 L, or any other tank that is 12 inches or lower. They do not have a built-in timer; however, I have found this to be more convenient by not having to program them or adjust them anytime the power flickers.
Supports basic plants
Provides nice spectrum
Comes in great ranges of sizes
Lease expensive

AquaNeat LED
Best Budget Planted Tank Light
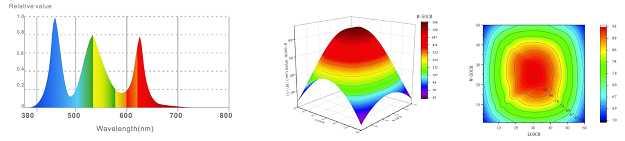
Hygger, a Chinese black box light, is by far the best bang for your buck when trying to grow plants. This is also the point by which we have to consider PAR. (Photosynthetically Active Radiation) PAR measures the amount of light projected in the aquarium, normally gauged at different depths. Consider this type of light when keeping plants in a tank greater than 12 inches in depth. Hygger’s lights are offered in programable and non-programable models in various lengths. https://a.co/d/h3foIYl Based on this graph, you can see the strength this carries compared to its competitors.

Competitors PAR Graph
Competitor Consideration
Each of these lights does have their cons and pros. The following will outlines those.
Fluval ( https://a.co/d/hsVO2fz )
Con
Price - This light may be more powerful, however, it is nearly quadruple the amount as a Hygger.
Pro
Control - Fluval’s light is wifi enabled and allows for full controllability on your phone. You can set sunrise sunset times and adjust spectrum/ light intensity.
Hygger
Con
Quality - This light is a Chinese light, therefore, it comes with Chinese quality. Its easier to break and more likley to have malfunction (trust me I know)
Pro
Price - The price for its capability is unmatched. No other light in it’s category meets its PAR for the price.
Current USA ( https://a.co/d/0F5q3hA )
Con
Price - Again a light that costs nearly triple to quadruple that of Hygger.
Pro
Unique Control - Current’s higher models offer exciting programs. They typically come with remotes to change all their modes and schedules. What makes it interesting is you have modes like thunderstorm, rain, and sunrise. These make for a unique ambiance. Furthermore, they partner this with the ability to plug in a speaker and a background light to add to the atmosphere. This will resemble storm, rainforest, and other options, making for nice relaxing background white noise.
Nicrew ( https://a.co/d/hHqqlth )
Con
Power - This light is very underpowered compared to Hygger, although, it is a bit more powerful than the AquaNeat.
Pro
Control - Nicrew lights offer a little bit more control than Hygger. They have a remote that comes with it to adjust and program.
Beamworks ( https://a.co/d/1Iss3VV )
Con
Price - Again this light is double to triple the price of the Hygger for a significant less PAR level.
Pro
Spectrum - Beamworks has a very nice spectrum that is visibly pleasing to the eye. I run this light on some of my low tech system to provide a really nice look. It also is set on nice clear bracket with a wide led spread.

Coming soon High tech light review and tier list.
Top Ten Nano Fish for a 10 gallon or less
Tired of a single betta? Need to Find Companions? Check out some options.
#1. Neon Tetra
The neon tetra is an iconic highly bred fish. One of the cheapest most colorful schooling fish in the hobby.
This fish only reaches one inch at full size and displays a rich blue color.
They are extremely peaceful and should be kept in groups of 6 or more for nice displays of schooling.
Safe with bettas and most semi aggressive fish.
Tank sizes from 5 gallons and beyond

Neon Tetra
#2 Endler Guppy
The smaller cousin of the Guppy, endlers come in a range of spectacular colors.
Generally more peaceful than guppies due to their size (1 inch max)
Livebearer - these endlers will reproduce via live birth therefore, the likelihood of multiplying the population is high.
These should be kept as just males or as a 1 male for every 2 females because males will chase down females all day for reproduction.
Tanks from 5 gallons and higher.
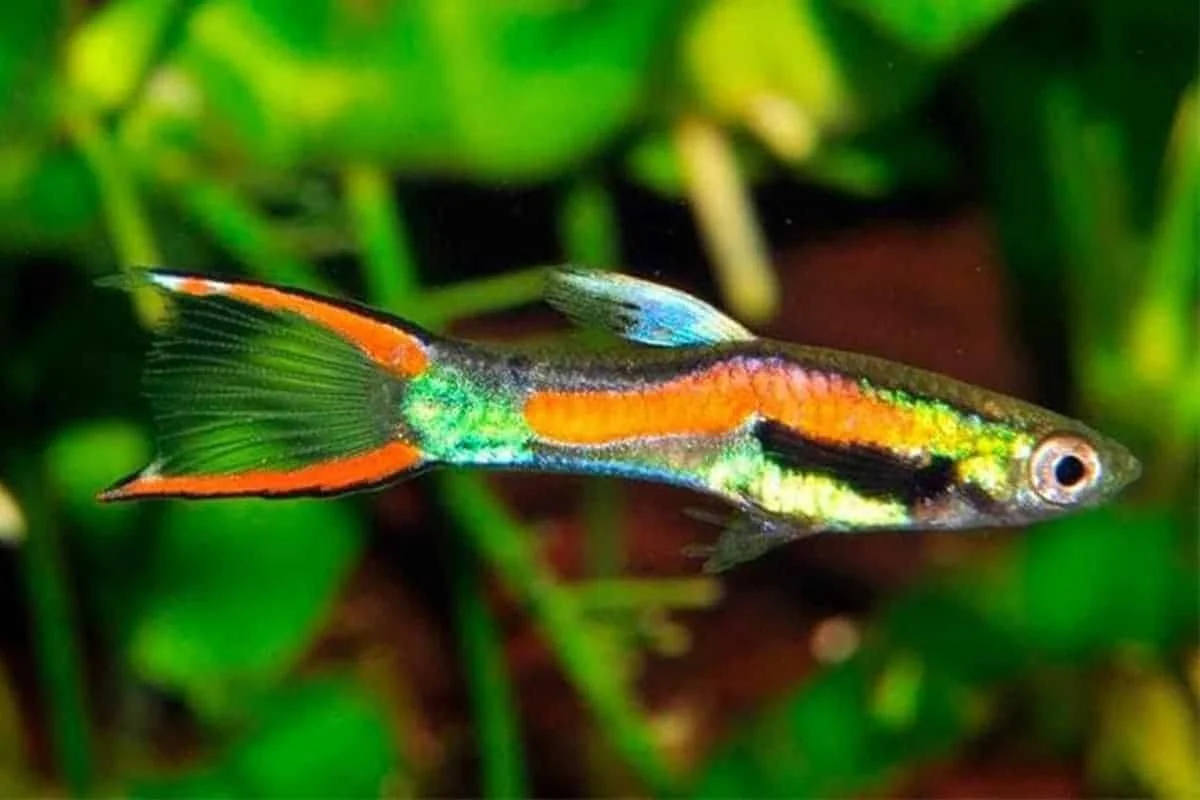
Male Emerald Endler
#3 Phoenix Rasbora/ Chili Rasbora
One of the smallest fish in the aquarium hobby, these rasboras grow to no larger than .75 inches.
They are a loosly schooling fish that display nice coloration.
Being their size they shouldn’t be kept with fish that can fit them in their mouth (Betta)
Downside, they require small food either finely crushed flakes, micro pellets, or baby brine shrimp.
3 gallons and bigger

Phoenix Rasbora
# 4 Celestial Pearl Danio (Galaxy Rasbora)
A beautiful fish with unique patterns and colors
Very peaceful and easily kept with many other nano species
These fish can be kept with or without a heater
They love moss and densely planted tanks.
CPDs are loose schooling fish reaching 1 inch max.
To have their color pop make sure to have a bright light to reflect their true colors.
5 gallons or greater.

Celestial Pearl Danio
#5 White Cloud
The white cloud is a cool water species, great for those nano tanks without a heater.
White clouds are a low cost fish that come in a variety of colors. Generally reaching an inch to an inch and a half.
They are relatively hardy fish and tend to be easy to keep.
None schooling fish that like a bit more swimming room.
They are known for their ease of breeding, however, the eggs need special care to hatch but make for a great project.
10 gallon or greater.
Longfin White Cloud Mountain Minnow
#6 Otocinclus Catfish
Very reminiscent of a pleco, these catfish are a nano suckerfish, great for grazing on algae and eating leftovers.
Although, not the most colorful they make for a great clean up crew.
Recommended to keep in schools of 3 or more, they will do great work while staying small. (1.5 inches)
Great cleaners for your betta tank
They are extremely peaceful and will keep to themselves, whilst being entertaining as they munch down on all that slimy residue.
5 gallon tank or greater
Otocinclus
#7 Pygmy Corydora
The pygmy cory is the smaller cousin of the corydora species, they remain extremely small while doing a similar job of its larger cousin. ( 1 inch)
These guys don’t like to be lonely and benefit from a small group to keep them active. (3+)
Although not as colorful as some of their cousins, their activity will be sure to delight your interest as they sift through the sand.
Pygmy cories do a wonderful job at turning over your sand or fine gravel to search for all that left over food and built up detritis.
5 gallon of greater.

Pygmy Corydora
#8 Pea Puffer
A cute micro version of the pea puffer. (1 inch)
These fish are generally peaceful and like to be in small groups. (3+)
They have a lot of personality and love to munch down on some blood worms.
They can be kept with several other nano species but should have a nice amount of coverage to feel safe.
5 gallon or greater.

Pea Puffer
#9 Ember Tetra
Another small nano Tetra, the ember tetra is a tight schooling tetra.
Although not the flashiest fish the males show a nice deep red coloration.
They make for a great addition to a larger betta setup.
These tetras reach a max of 1 inch and are generally very peaceful.
5 gallon or greater.

Ember Tetra
#10 Scarlet Badis
Scarlet Badis are a little harder to keep than any of the other listed above due to their diet. (Micro food prefer live food)
They are absolutley beautiful fish with a deep red color and stripped flourecant patterns.
These fish are primarily bottom dwellers that eat off the substrate.
The second smallest fish on this list at .5-1 inch these fish can go in tanks from 3 gallons and above.
If you ever see one of these without color scoop it up because females are extremely rare.

Scarlet Badis

Cycling Tanks
Setting up a tank, the various ways.
Preparing a tank for Fish
The process of cycling a tank is what we call the nitrification of water. This process allows bacteria to build within the tank to make it safe for fish. Let's use an analogy. For instance, we need healthy bacteria in our bodies to ward off disease and sickness. In a similar sense, fish need the same thing. When a fish excretes waste, this produces ammonia. Without beneficial bacteria, nothing prevents this ammonia from being toxic. Therefore, allowing this process to occur before introducing fish, there's less likelihood of death due to suffocation or ammonia burn.
Now for ways we do this.
1. The Natural way. This process is done by adding water, tap water conditioner, a heater, and your filter. The water will naturally gain bacteria from the air through oxygenation. However, this is a long process. On average, it will take 3-6 weeks to convert ammonia into nitrites, then into the safer product nitrates. Once the tank no longer shows nitrites or ammonia, its a signifier of a cycled tank.
Ways to speed up the natural process.
Turn the heat up (80+)
Add a bubbler, the extra aeration of the water will build bacteria faster
Ghost feeding (add a bit of food every 3 day) By adding food it will decay into ammonia from which will kick start the process.

2. Artificial way. All of the above should still be done. However, where we differ is in adding chemicals—specifically synthetic bacteria. Doing so will kick start this process and lessen your cycling time by nearly half. 2-4 weeks. This ultimately depends on the size of the tank and the quality of bacteria you add. This artificial bacteria is exactly what it sounds like; it kick-starts the process and speeds it up for us impatient types.
Types of bacteria I recommend
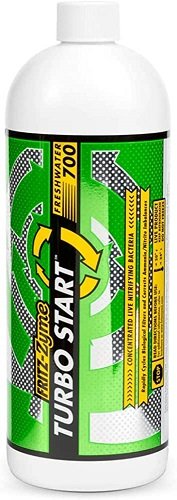
Turbo smart by Fritz. This is a chilled live bacteria
Dr. Tims, a dead bacteria but proven to work.
Do other work? Yes….. however, it seems very unreliable and likley a waste of money most the time.
3. The hobbyist way. This process is the most efficient and quickest. However, it requires a bit of extroverted action at times. Follow the steps from #1. Use water from an already-established tank. (The older the tank, the better) Grab filtration from an established tank and ring it out into your new tank( sponge filters, cartridge filters, etc. The dirtier the filter, the better. These filters are absolutely loaded with beneficial bacteria. It's essentially a free version of Turbo smart or Dr. Tims. In my experience, I have been able to cycle tanks within days, sometimes even 24 hours. Essentially you are using another tank to start a tank.
Another thing to consider is using a filter from another tank. If you bought a filter for the new tank, use it on the old tank and put the old one on the new tank. Essentially it's like cleaning your old filter.
